
Requirements
- Connection to the Stabi Berlin Wi-Fi network (WLAN-SBB)
- A Copy card, with sufficient print credit
- Administrator privileges on the laptop
Downloading the printer driver
1. First, download the printer driver (PS Driver for Universal Print):
https://support.ricoh.com/bb/html/dr_ut_e/re2/model/imc3000/imc3000.htm
2. Once downloaded, open the file by double-clicking it.
4. When the program starts, a dialogue box lets you choose the folder for the driver files. You can accept the default or enter a path such as ‘C:\Ricoh-Treiber’ to make the folder easier to find.
5. Click ‘Unzip’ to extract the files.
You can then close the program.
Installation of the printer driver
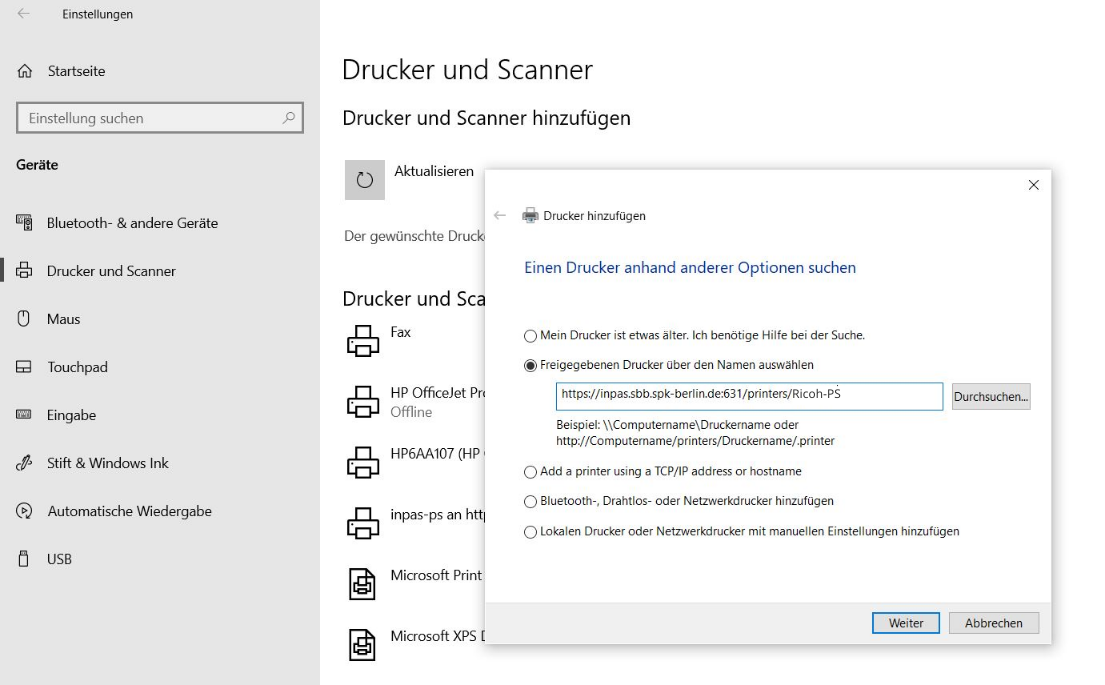
6. Select the ‘Start’ button, then Settings > Devices > Printers & scanners > ‘Add a printer or scanner’.
After you click +, Windows will search for connected printers and scanners.
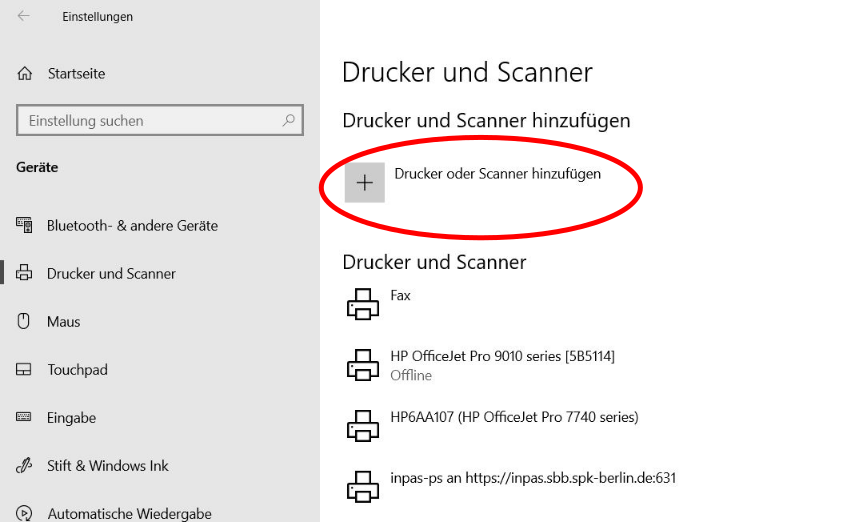
7. Select ‘The printer that I want isn't listed’. A new window will open.

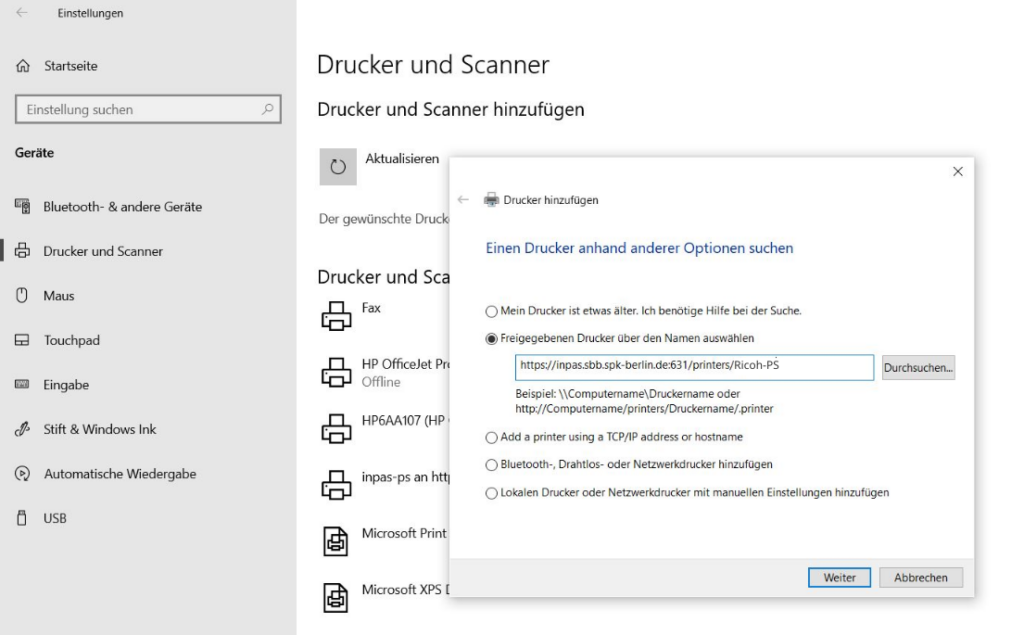
8. In the ‘Select a shared printer by name’ field, enter the following network address:
https://inpas.sbb.spk-berlin.de:631/printers/Ricoh-PS
Then click ‘Next’.
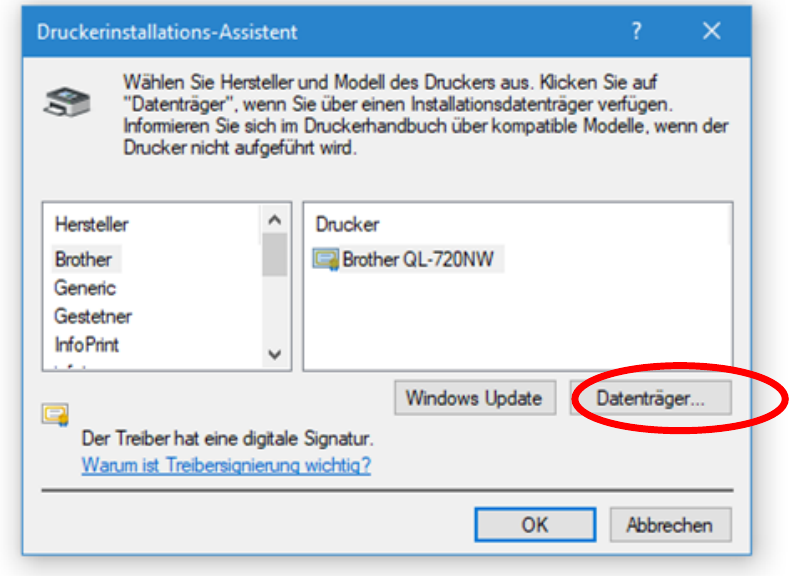
9. In the next dialogue, click ‘Have Disk’ to
select the driver.
10. Go to the folder where the driver files were extracted (C:\temp or C:\Ricoh-Treiber). Open the ‘disk1’ subfolder, then click ‘Open’.
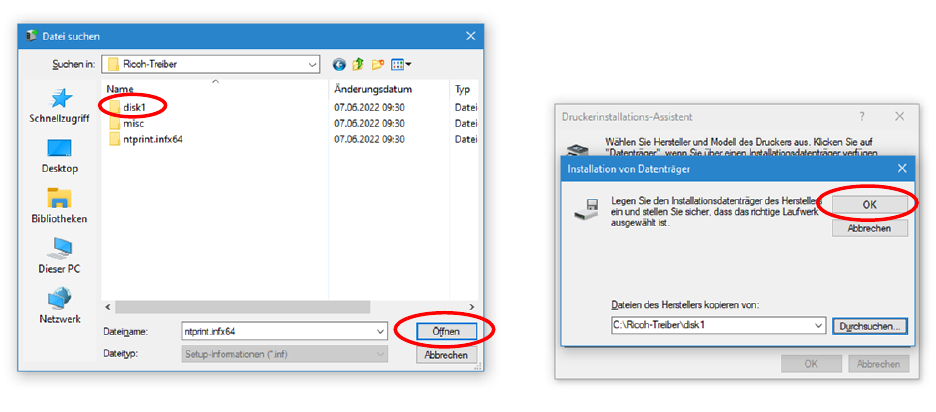
11. The driver-installation dialogue will reappear. Click ‘OK’ to confirm.
12. A list of drivers in the package will appear. Select ‘RICOH PS UniversalDrucker V4.33’, then click ‘OK’.
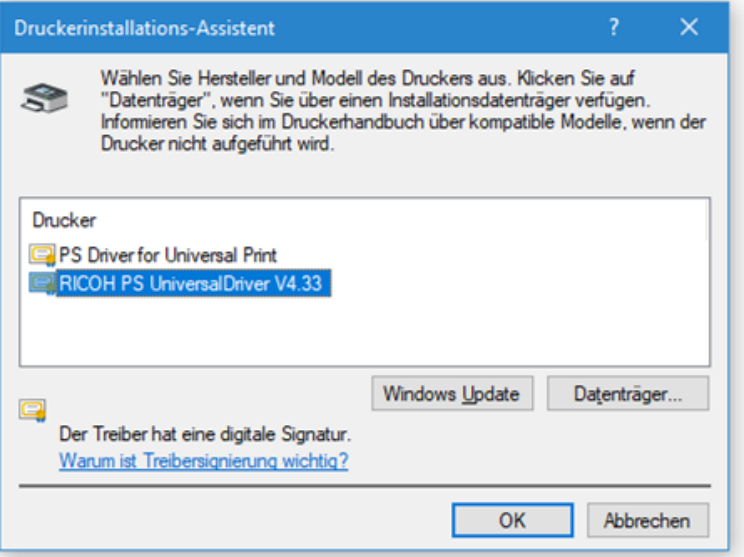
13. You may then need to confirm the installation of the new driver.
14. A confirmation message will appear after the driver is installed. Close it.
15. A final dialogue box will appear after you close the message. Close it; the printer will now appear in the list.
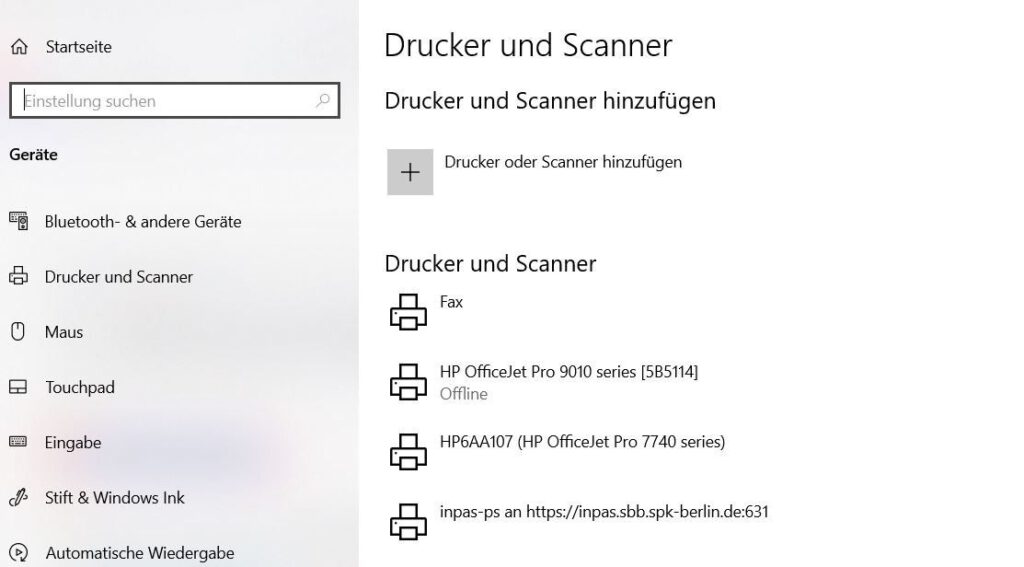
Adjust printer settings
Now adjust the installed printer's settings.
16. In the printer list, select the installed printer and click ‘Manage’.
17. Then select the printer properties.
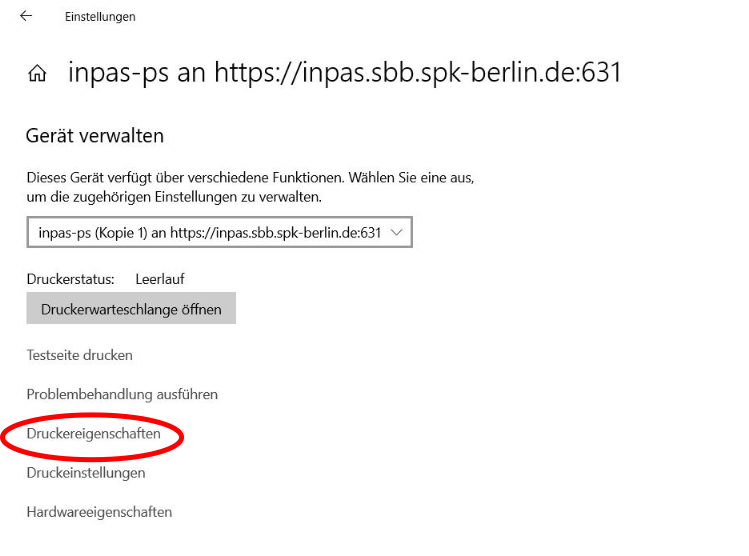
18. Under the ‘Device Settings’ tab, set two options to ‘Yes’:
- Convert grey text to PostScript grey
- Convert grey graphics to PostScript grey
Click ‘Apply’ to save the settings.
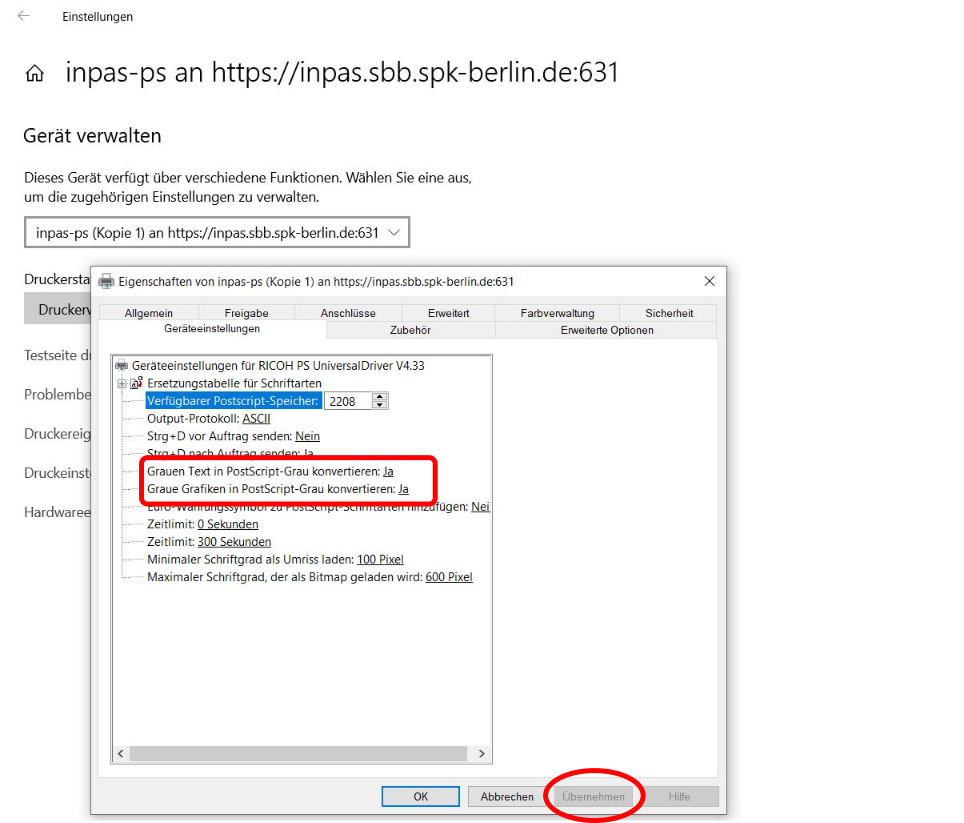
The dialog window closes and the correct settings are set.
Authentication with the copy card
To use the printing system, you must now authenticate using the number on your copy card.
19. Select ‘Advanced Options’.
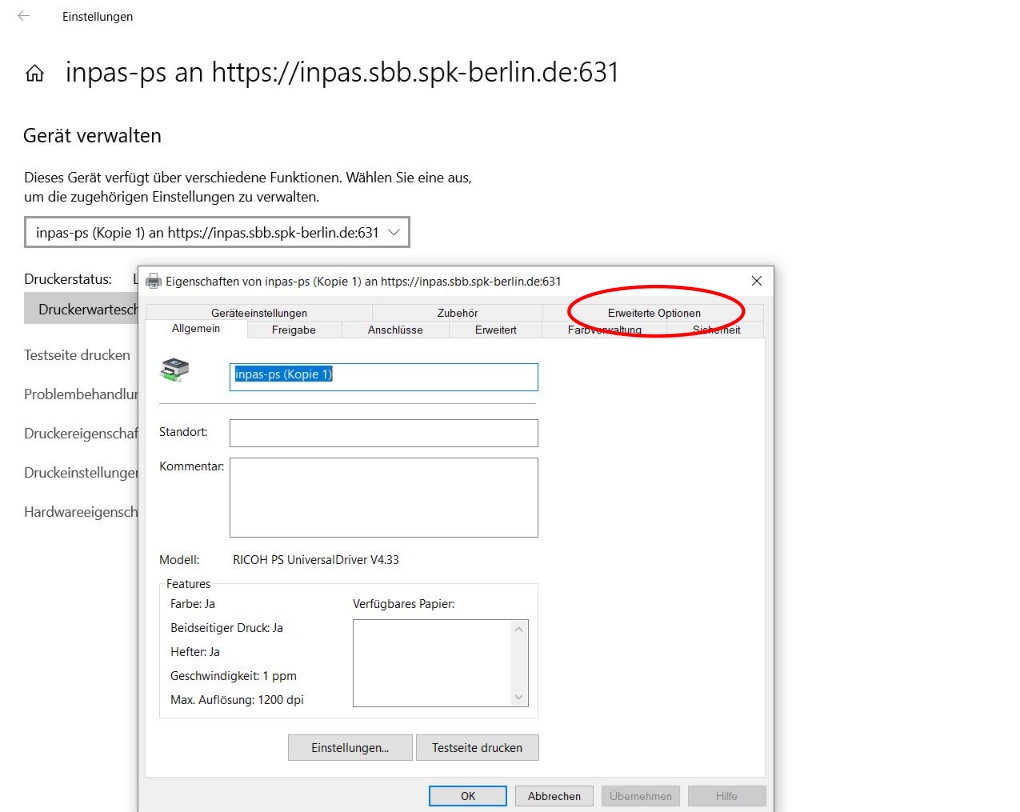
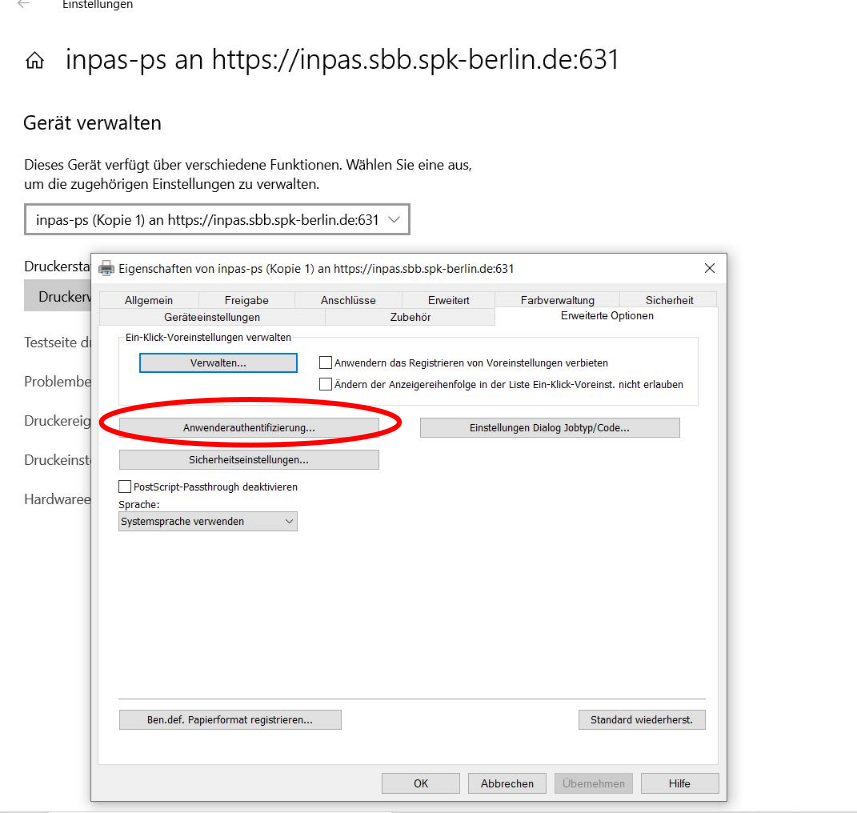
20. On the ‘Advanced Options’ tab, click ‘User Authentication…’.
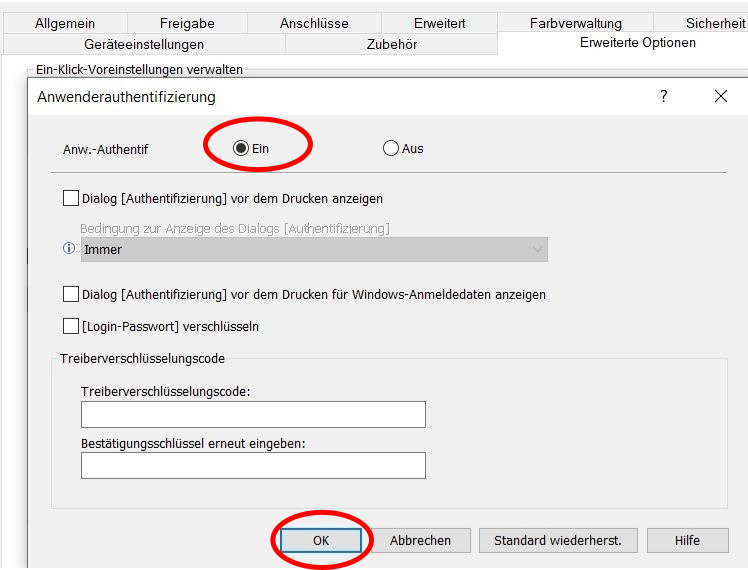
21. Select ‘On’, then click ‘OK’.
22. Then open the printer settings.
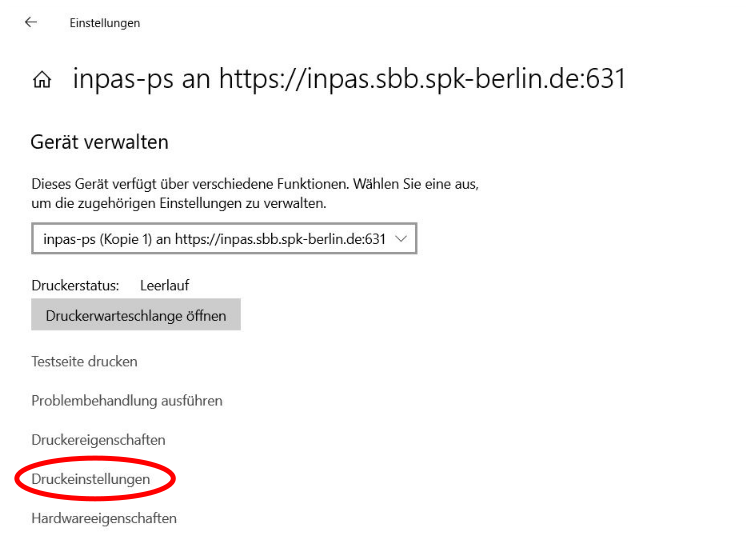
23. Select ‘Authentication’ in the top-right corner.
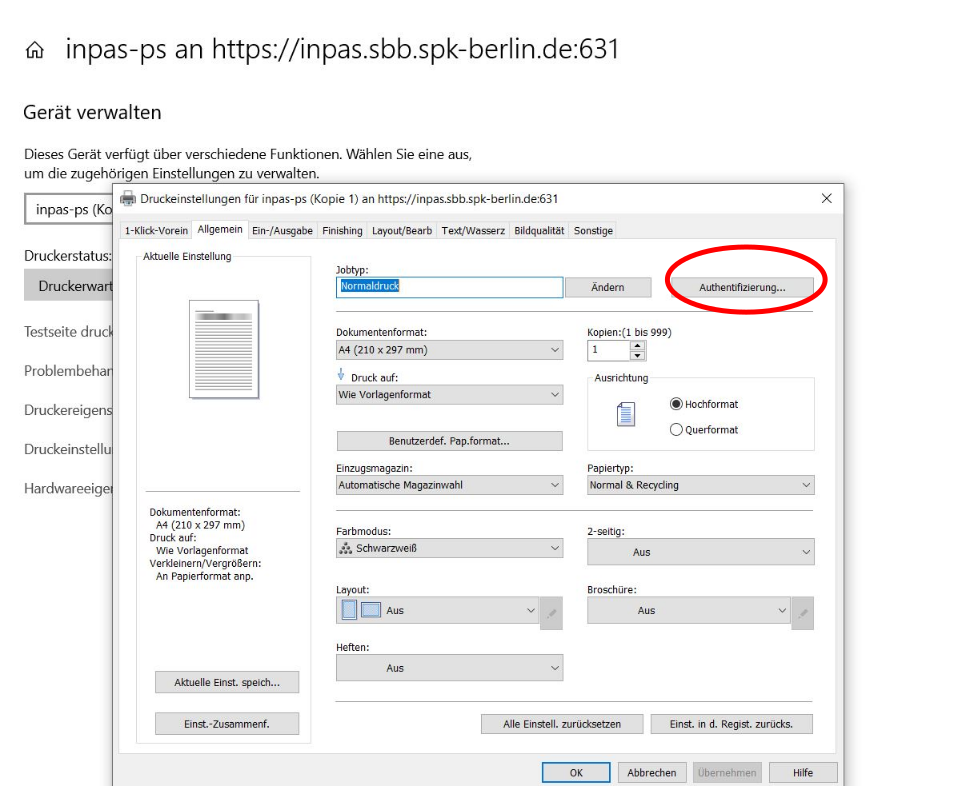
24. Select ‘Defined User ID’ and enter the number on the copy card.
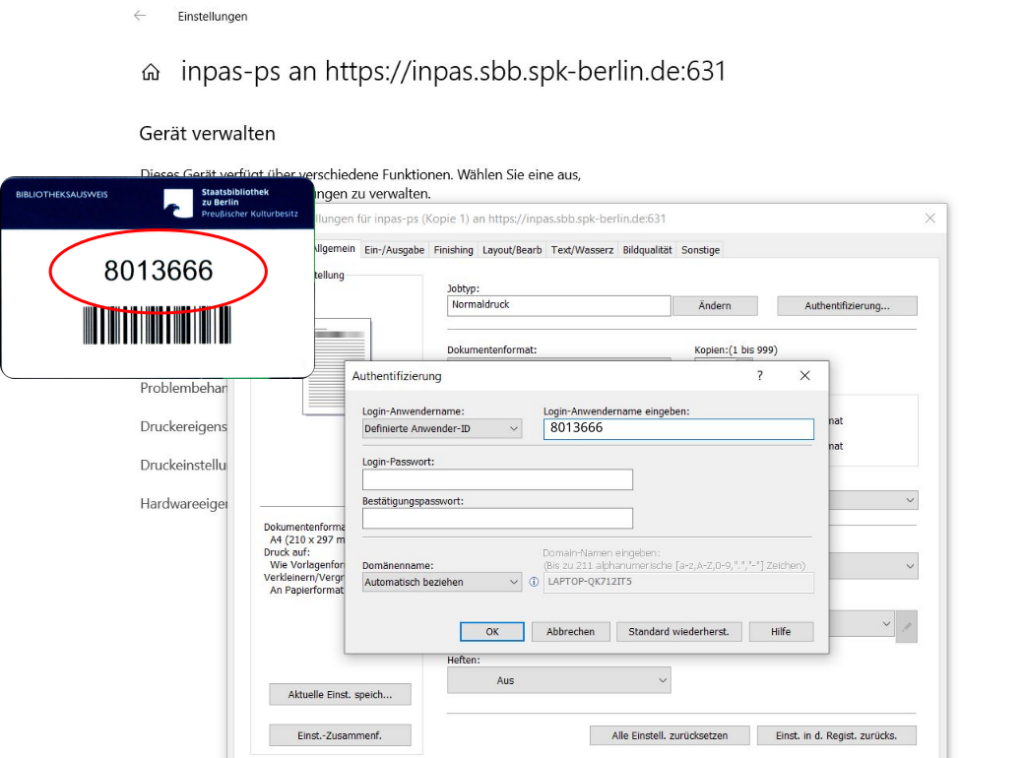
25. Click ‘OK’ to complete this step.
26. In the following ‘Printing Preferences’ window, click ‘Apply’ to complete the process.
The new printer is now installed!
After restarting your computer, you can use the new printer. Collect your printouts from the RICOH printers at BiblioCopy using your copy card.